Upgrading from Android 1.1 SDK to 1.6 SDK
I recently upgraded from Android 1.1 SDK to 1.6 SDK and encountered a few issues during the upgrade process.
The first mistake was not reading the upgrade instructions carefully. I misunderstood the statement: “If you currently have version 0.9 or 0.9.1, then you don’t need to uninstall…” to mean 0.9 SDK. The instructions are actually referring to Android Developer Tools (ADT) version 0.9 not the SDK version. After getting a half-baked 0.8 and 0.9 mix of ADT, I uninstalled all of the Android Developer Tools and started over with a fresh install of the 0.9x ADT. And just like months ago, the https URL did not work and I had to use http://dl-ssl.google.com/android/eclipse/ to download the latest tools.
The 1.6 upgrade instructions implied that I could just run my old source right away after the upgrade. Well, it took a little more effort. The real key for me was finding the 1.5 upgrade instructions which served as a better guide for upgrading from version 1.1.
After upgrading, Eclipse (Ganymede) was unable to “just run” my old projects. The Eclipse editor highlighted in red Android classes used in my projects. In the Android Console I also got these messages for one project:
“Conversion to Dalvik format failed with error 1”
and
“Attempt to include a core VM class in something other than a core library…”
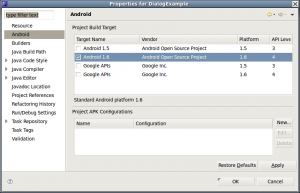
To fix this you need to select a build target. Right-click on the project and select Properties. In the Properties screen, select Android on the left, then check the box for Android 1.6.
After doing this some new folders were created under the project including a gen directory. Then Eclipse highlighted the “R”s in the resource references used in code, such as in R.layout.main. To correct this, select the project in the Package Explorer, then select Project from the main menu and then Clean.
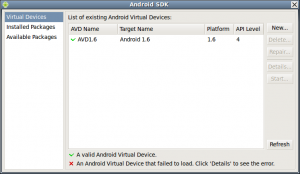
The last part of the upgrade was to define an Android Virtual Device (AVD). To do this, from the main menu select Window / Android SDK and AVD Manager, or click the mobile phone icon on the toolbar. The following screen opens.
I named my new SDK 1.6 compatible AVD: “AVD1.6”.
After this I was able to run my old 1.1 code in the new, version 5554, emulator.
However, on a different project I somehow had a duplicate reference to the 1.6 library. One was to the 1.6 SDK directory on my file system, the other was what looked like an auto-generated reference with an archive icon and labeled as “Android 1.6”. On the project properties dialog under “Java Build Path”. I removed the file system reference and that solved the duplicate reference error.
The last step of my upgrade to 1.6 was to re-upload my app’s data files to the data/data/

