The android Activity documentation for setResult() states: “to set the result that your activity will return to its caller.” So why does setResult(MyActivity.MY_RETURN_VALUE) not return your custom value to the calling activity’s onActivityResult() event? To return a value other than RESULT_CANCELED you need to Read more…
Sometimes we need to maintain the selected position in a list. This example was taken from a real-world, off-road application where users interact with the application in a bumpy environment and need a fool proof way of changing the sort order of items in a list. When an item is clicked in the list and that row becomes the selected row as indicated by a different background color. The user can then change the position of the selected row using the Move Up and Move Down buttons on the screen.
Here’s a screen-shot of this example running in the emulator.
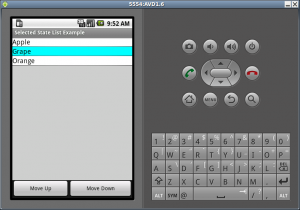
Android Selected State List Example
I recently upgraded from Android 1.1 SDK to 1.6 SDK and encountered a few issues during the upgrade process.
The first mistake was not reading the upgrade instructions carefully. I misunderstood the statement: “If you currently have version 0.9 or 0.9.1, then you don’t need to uninstall…” to mean 0.9 SDK. The instructions are actually referring to Android Developer Tools (ADT) version 0.9 not the SDK version. After getting a half-baked 0.8 and 0.9 mix of ADT, I uninstalled all of the Android Developer Tools and started over with a fresh install of the 0.9x ADT. And just like months ago, the https URL did not work and I had to use http://dl-ssl.google.com/android/eclipse/ to download the latest tools.
Read more…
Here’s a simple desktop dialog that allows the user to select an item from a list and then click an “Action” button to act on the selected item.
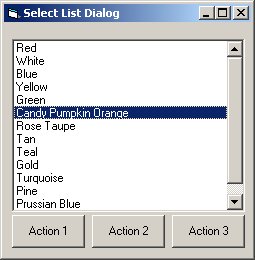
desktop list dialog
How it works – a user selects an item in the list, that row is highlighted, the user then clicks one of the buttons below the list, the application retrieves the selected index, acts on the selected item and the application continues. Simple right?
Read more…
This is a basic dialog example that includes a scrolling widget container with an “Ok” and “Cancel” button on the bottom of the screen. This is a general use dialog with a lower case “d” not to be confused with the Android Dialog class. A scrolling area is far from a sophisticated layout design but it is a simple solution for supporting various display sizes. This basic dialog can be used to show user messages, editing of application settings and more. A vertical scrolling layout also future-proofs your applications for distribution on new Android devices with different screen dimensions than what we’re building for today.
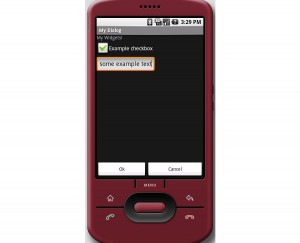
scrolling dialog screen
While porting some older Java code to the Android platform, I read that it was possible to place custom files in the “files” directory reserved for the application. Great, that’s exactly what I need since packaging data files with the application as resources did not make sense in this case. So how do you move your own files into this directory?
With the Android emulator running, in Eclipse open the DDMS perspective, then select the File Explorer tab. Expand the directory tree to: data/data/com.your.package. Ok so where’s the “files” directory? Good question. Other posts I read on this subject seemed to assume that it will just be there. However on my emulator the files directory is not there by default. So how are we supposed to create the files directory?
Here’s one way. In your code write a test file to the default location, meaning don’t prepend with a path. Doing this will create the files directory and will also write the test file there as well. One caveat, if you delete all of your emulator temp files, the files directory and it’s contents will also be destroyed.
Here’s some code to write a test file into the files directory:
try{
  // this forces the files directory to be created under the package name
  FileOutputStream fileOut = mcontext.openFileOutput("test.txt", Context.MODE_WORLD_WRITEABLE );
  fileOut.close();
}catch(Exception e){}
After executing the above code on your emulator, you should now see a directory named “files” at data/data/com.your.package/files. This code needs to import java.io.FileOutputStream and also uses a reference to the Context.
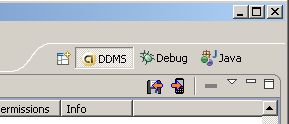
Pull and Push icons
Move files into your new files directory by clicking the Push Files icon in the upper right corner of the DDMS-File Explorer view. If you know of an easier way to create the files directory please let me know.
This example demonstrates basic drawing concepts using the Google Android SDK. The best way to understand a drawing api is to actually use it. This example extends Activity, creates a subclass of View and overrides the View.onDraw(). All of the drawing code in this example is located in the onDraw() method.
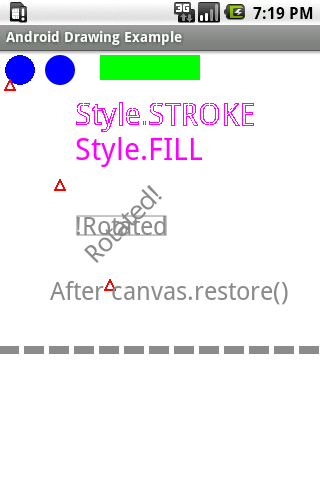
Android drawing example
Read more…


